Probiotic Oat Clusters and a Homemade Coconut Yogurt Recipe

Today, I’m sharing a three-ingredient coconut yogurt recipe, and some exciting news!

My favourite granola company in the whole universe, Rawcology, just released a new product that I’m over the moon excited about. Oat Clusters, infused with probiotics! Rawcology is a Canadian-owned family business with a mission to create nutritive, organic plant-based snacks from mother Earth’s goodness. If you follow me on Instagram, you’ll know Rawcology is a much-loved part of my morning ritual. I sprinkle their Sprouted Grain-free Granola atop smoothies and yogurt bowls, and eat the Superfood Coconut Chips straight from the bag. One way or another, Rawcology makes it into my meals almost daily!

Their newest product - Oat Clusters with Probiotics - is for those looking to support the gut and improve digestive health. With just a handful of whole-foods ingredients and nothing funky, this granola makes the dreamiest breakfast addition or satiating afternoon snack. The oat clusters are gently sweetened with a touch of coconut sugar - not overly sweet like many store brought granolas. They also come in three flavours - Berry Burst, Apple Cinnamon, and Chocolate. Made with gluten-free oats and infused with probiotic cultures, nutritive seeds, pink Himalayan sea salt, and virgin coconut oil, the clusters offers 1 billion live cultures per serving, and only 5 grams of sugar. Delicious, whole-foods based nourishment.

You can currently find the oat clusters in-person within B.C. at Pure Integrative Pharmacy, Victoria’s Health, Treehouse Health food, and Healthy Treasures (with more to come!) and online at Well.ca, NaturaMarket.ca, Amazon.ca, and Rawcology.com. If purchasing through Rawcology’s website, use the discount code “HANNAH10“ at checkout for 10% off all products!

Including probiotics in our diet is incredibly important for our overall health and well-being. Probiotic-rich foods feed the gut-microbiome, promoting a diverse selection of good gut bacteria. Research now shoes our gut is the centre of the entire body, connecting and affecting every other bodily system. A well-functioning gut not only supports digestive health, but also affects our immune system, cognitive function, mood, memory, inflammation levels, hormone production, blood sugar balance, and more. Probiotic-rich foods play in essential role in helping these systems flourish!

To learn more: follow Rawcology on Instagram, at @rawcology!

 
FullSizeRender 98.jpg

Coconut yogurt is a fermented food, providing another excellent probiotic source. Let’s learn how to make it!

After choosing to remove dairy from my diet many years ago, cultured coconut milk yogurt quickly became a favourite alternative. Using full-fat coconut milk instead of dairy, this yogurt is easy to digest, filled with nourishing fats, and completely plant-based. While there are plenty of coconut yogurt brands on the market, many contain added fillers, preservatives, and hard-to-digest gums. Thankfully, making your own is SO simple, and only requires a few easy ingredients. All you need is a can of full-fat coconut milk, a clean class jar, a couple probiotic capsules, a thickening agent, a wooden spoon, and a mesh cheese cloth.

For this recipe, I like to use either organic full-fat canned coconut milk or coconut cream. Look for a coconut milk that contains minimal ingredients (coconut and water) and comes in a BPA-free can. I recommend staying away from coconut milk with added fillers. For the probiotic, I used two capsules of Genestra Brand’s HMF Intensive 25 billion probiotic supplement, for a total of 50 billion CFU per jar. These are the same probiotics I take nightly! I recommend using a high-dose probiotic for this recipe to be most nourishing and effective.

Once the mixture is prepared, ferment the yoghurt overnight for a minimum of 24-48 hours. My yogurt is usually ready within a day or two during these hot summer months, but it will likely take longer in the winter, or a colder home.

After the yogurt is fully fermented, I like to add a thickening agent right at the end. This helps achieve a thicker, creamier consistency. Agar is my thickener of choice, but arrowroot starch or gelatine work too. Agar is a natural vegetable ‘gelatine’ obtained from red algae, while arrowroot starch comes from tropical plants. Both are lovely plant-based options!

When your yoghurt is ready, feel free to stir in maple syrup, raw honey, pure vanilla extract, or stevia to sweeten. This yoghurt is SO yummy topped on oats, mixed with fruit, and paired with Rawcology’s Oat Clusters. It’s a must-try duo!

IMG_0843.jpg

3-Ingredient Coconut Yogurt Recipe

  • 1 can organic full-fat coconut milk or coconut cream

  • 2 probiotic capsules (for a minimum of 50Billion CFU) - make sure they don’t contain pre-biotics!

  • 1 tbsp agar or arrowroot starch

  • Optional - pure vanilla extract, maple syrup, honey, or stevia to sweeten

  • Rawcology Probiotic Oat Clusters for topping (use code HANNAH10 for 10% off order at checkout)

Method

In a clean, thoroughly washed glass jar, add the coconut milk. To ensure your jar is sterilized, wash with boiling water prior to use. This will decrease the likeliness of contamination during fermentation, which results in moldy yogurt!

Open two probiotic capsules, and empty power into the yogurt. Mix well using a wooden (or plastic!) spoon until smooth. Avoid using a metal utensil, which can negatively react with the probiotics!

Cover the jar with a thin layer of cheese cloth, secure with an elastic band, and place in a warm part of your home. Let sit for a minimum of 24-48 hours to ferment. You’ll see little bubbles begin to appear, and the yogurt will slowly grow thicker. This is a good sign! Depending on the brand of coconut milk you use, separation will likely occur. This is normal.

Once the yogurt has fermented to your liking, remove the cheesecloth and stir in 1 tbsp agar or arrowroot starch to thicken. Place in the fridge to chill. As the yogurt cools, it will continue to thicken.

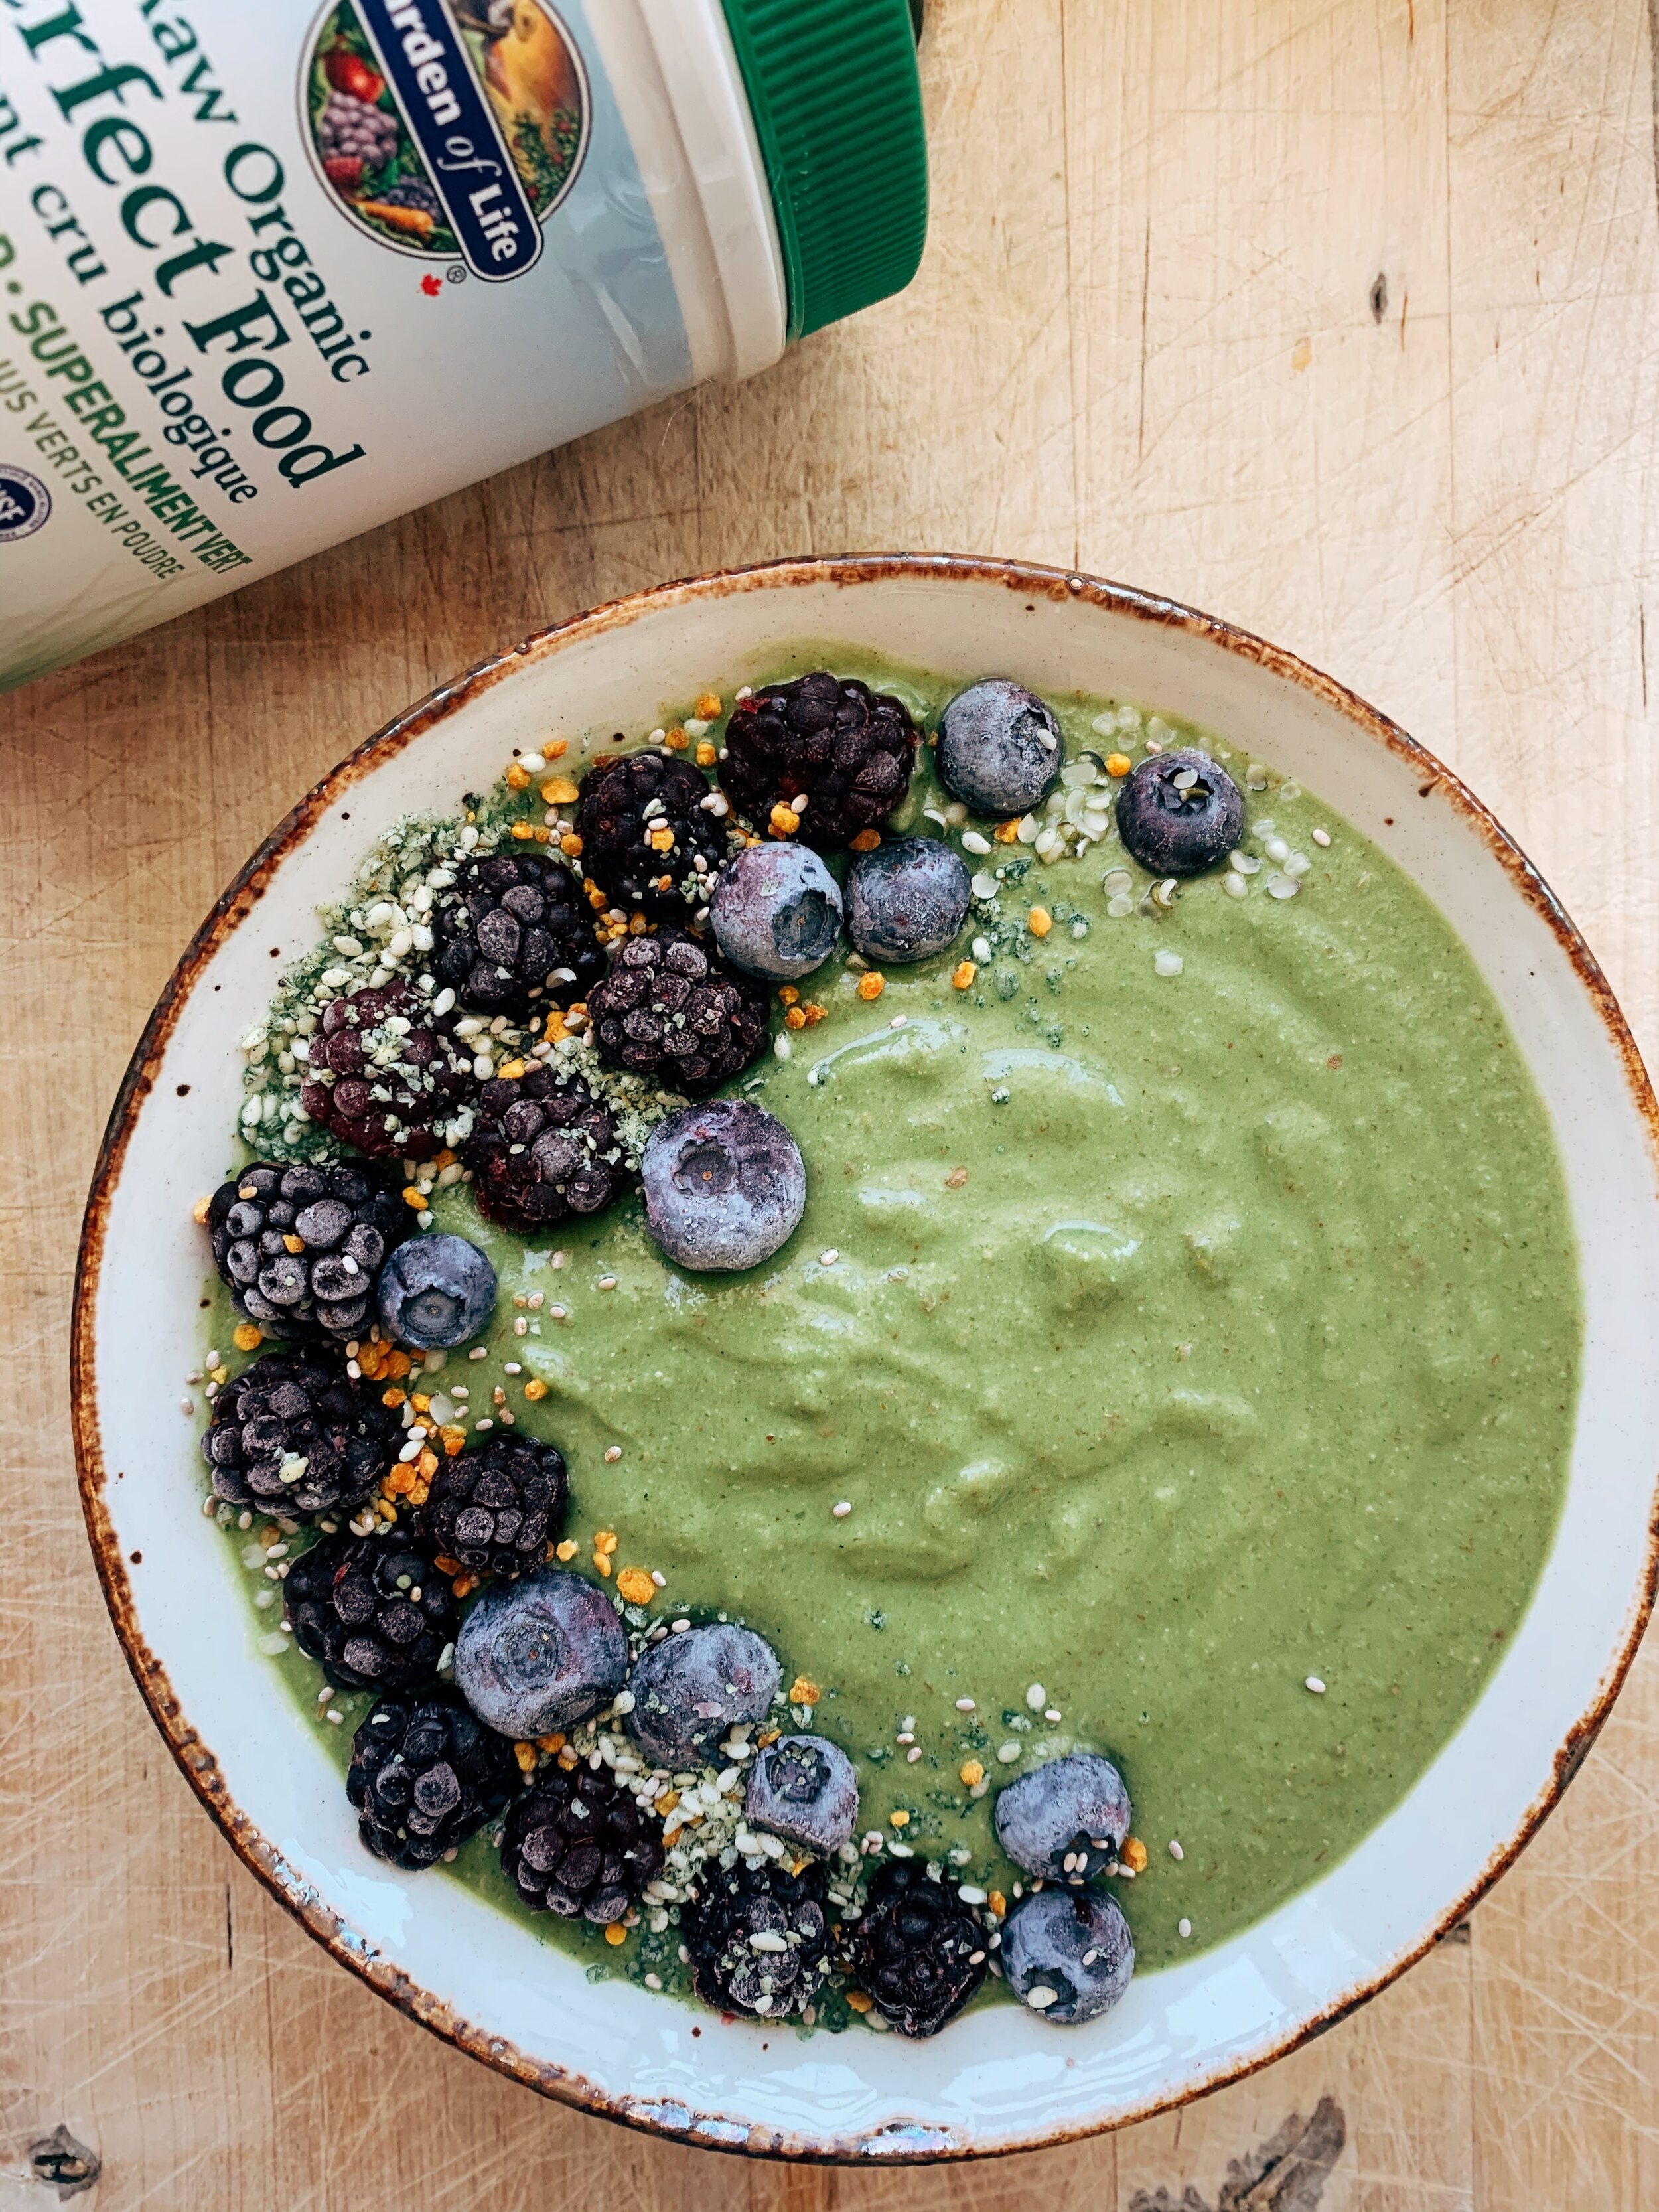
When ready to serve, feel free to stir in a touch of vanilla and whichever natural sweetener you prefer. Combine in a bowl along with fresh or dried fruit, berries, nuts or seeds, and Rawcology’s Oat Clusters of choice. This is what breakfast dreams are made of!

This post is lovingly sponsored by Rawcology. Thank you, Rawcology, for making Wholistically Hannah possible!

Plant-Based Strawberry 'Ice-Cream' Bars (Raw, Vegan, GF)

A light and fruity plant-based twist on a favourite summer dessert! I’m alllllll about the raw, no-bake treats this time of year. I have absolutely zero desire to turn on the oven as the days grow warmer, and these bars are the perfect solution. Made with fresh California strawberries, ripe frozen bananas, and creamy coconut butter, these plant-based “ice-cream” bars make the most decadent (yet nourishing!) snack on a sunny afternoon.

These gorgeous bars are made in partnership with California strawberries, which are in peak season! Strawberries hold childhood nostalgia for me. They’re reminiscences of warm June days in the garden, and picking bountiful sun-kissed berries. It may still be Spring, but warmer days are fast approaching. And these sweet, juicy, vitamin-c rich fruits hold the first taste of summer.

FullSizeRender 84.jpg
FullSizeRender 86.jpg

RECIPE

Ingredients

Base

  • 1.5 cups walnuts

  • 1 cup dates

  • ½ tsp vanilla extract

  • Pinch of sea salt

Filling

  • 1 heaped cup California strawberries, frozen

  • 2 ripe bananas, frozen and cubed

  • ¼ cup coconut butter, softened

  • ¼ cup pure maple syrup

  • 1 tsp vanilla extract


Method

For the base

  1. Line a tupperware container or small square baking dish with parchment paper.

  2. Combine walnuts, dates, vanilla, and sea salt in a food processor, and blend until a sticky mixture forms.

  3. Press mixture evenly across the dish to form the base. Pop in the fridge to firm for 30 minutes.

For the filling

  1. In the food processor, combine frozen bananas, California strawberries that were frozen in advance, maple syrup, and vanilla.  Blend until mixture begins to puree.  Add the coconut butter, and continue to process until smooth.

  2. Transfer the filling to the dish and spread evenly over the prepared base.  Optionally, top with additional sliced California strawberries or any other toppings you’d like.

  3. Place in the freezer to chill for approx. 2.5 hours.  Once fully set, slice around the edges to remove from the dish, cut into squares, and serve!  While the bars are best eaten on the day of making, they can be kept in the freezer to preserve.

This post was lovingly sponsored by California strawberries, but all thoughts and options are my own. Thank you, California strawberries, for making Wholistically Hannah Possible!

FullSizeRender 89.jpg
FullSizeRender 87.jpg

Vanilla Rose Cashew Cookie Mounds

The ultimate treat for nourished hormones, women’s wellness, and fertility. Spring has arrived over here on the Sunshine Coast of BC, and so has the season of no-bake dessert! So, I just had to create a raw treat to support hormonal balance, inspired by the fresh pink blooms and floral scented air. Infused with luscious vanilla, yin-enhancing rose, and aphrodisiac maca, these herbal cashew cookie mounds are both medicinal and delicious.

You won’t believe how simply these little balls come together. All you need is a food processor and handful of pantry staples. Cashews and coconut butter add a boost of healthy fats and creaminess, while pure maple syrup offers a touch of refined-sugar free sweetness. Feel free to omit the rose and / or maca if these ingredients aren’t accessible to you. The balls will be just as delicious!

IMG_9523.jpg

RECIPE

Ingredients

  • 1 cup raw cashews (preferably soaked)

  • 1 cup almond flour

  • 1/4 cup maple syrup

  • 1/2 cup coconut butter

  • 1 tsp vanilla extract

  • Pinch of sea salt

  • 1 tsp dried rose petals

  • 1 tsp maca powder

  • 1/4 cup cashew or coconut milk

  • 1/2 cup coconut flakes

Method

  1. Combine all ingredients in a food processor, and blend until smooth.

  2. Roll into balls, and place in the freezer of fridge to chill.

  3. For the icing, I mixed together coconut yogurt, melted coconut butter, and beetroot powder. Topped with additional coconut flakes to serve!

Almond Flour Thumbprint Cookies

Last week, I shared my Almond Flour Thumbprint cookie recipe over on Instagram. Due to popular request, I decided these beauties deserved a home on the blog all of their home. Made with only 4 simple ingredients, these beautiful yet nourishing cookies are simple, delicate, and dreamy. Think chewy, walnut crusted cookies with ooey, chia jam-filled centres. They practically melt in your mouth!

For sweetness, I used cold-pressed honey in this recipe. Honey is one of my favourite whole-foods based sweeteners, and raw honey in particular is truly a medicinal food! Unlike processed sugar or refined honey (like the liquid you’d find in those teddy-bear jars!), cold-pressed honey doesn’t undergo any sort of refinement, heating, or processing. This means all the live cultures, enzymes, and anxtioxidants are fully retained. Baking with honey turns your favourite sweets into a medicinal treat!

I love to load up on an abundance of liver-loving berries as soon as the first flowers of Spring begin to bloom. With sunny-day festivities and the hope of a new season on the horizon, it’s the perfect time to find creativity in the kitchen!

IMG_8700 2.jpg

INGREDIENTS

Cookies

  • 2 cups almond flour

  • 1/4 cup @eliashoney cold-pressed clover honey

  • 1/4 cup avocado oil

  • tsp vanilla extract

  • Pinch of sea salt

  • 1/4 cup finely chopped walnuts

Filling

  • 1 cup frozen berries

  • 1 tbsp honey

  • 1 tbsp chia seeds

METHOD

  1. Preheat oven to 350. Line a baking tray with parchment paper.

  2. Whisk together honey, avocado oil, and vanilla. Add almond flour and sea salt, then mix together until dough forms.

  3. Shape into balls, then roll each one in the finely chopped walnuts to coat. Place each cookie on baking sheet, and gently press down to flatten slightly. Poke a large hole in each centre for the filling.

  4. Combine frozen berries and honey in a small pot on the stove, and heat on medium-low until they begin to break down. Mash the berries using a fork to purée. Remove from heat and stir in chia, then let thicken for 5 minutes. Fill each centre with jam.

  5. Bake at 350 degrees for approx. 20 minutes. Let cool completely before removing from sheet.

IMG_7657.jpg
FullSizeRender 12.jpg


Buckwheat Breakfast Granola

Buckwheat breakfast granola! 🌈 Hearty, radiant, crunchy, and versatile, this lightly sweetened breakfast granola is packed with healthy fats, nourishing nutrients, fibre, and protein. It’s also soooo easy to make! The perfect topping to sprinkle on morning smoothie bowls, served in a bowl with cold nut milk, or snack on straight from the jar.

IMG_5211.jpg

RECIPE

I N G R E D I E N T S


DRY
2 cups rolled oats
1 cup buckwheat groats
1 cup shredded or flaked coconut
1/2 cup roughly chopped nuts (I used almonds)
1/2 cup pumpkin or sunflower seeds
1/4 cup chia seeds
1/4 cup dried berries
1/2 tsp sea salt
1 tsp vanilla

WET
1 extra ripe banana, mashed
1/3 cup maple syrup
1/3 cup runny nut butter (I used organic peanut butter)

M E T H O D


Preheat your oven to 350 degrees. Line a baking sheet with parchment paper. Mix all dry ingredients together in one bowl. Mix all wet ingredients together in another bowl. Combine the two and mix until a damp, sticky mixture forms. Spread the mixture evenly across your baking sheet, then bake for 20 minutes. Flip granola, then bake for another 20 minutes. Take out, or continue to bake in 5 minute intervals until desired crunchiness is achieved. Store in a glass mason jar with lid.


Rainbow Mounds for Radiant Hormones

Eat the rainbow to feel like a rainbow! And what better way to eat the rainbow than with nourishing, plant-based treats? These seedy, nutrient dense Rainbow Mounds are straight from mama earth. Made with a variety of whole-foods ingredients, these mounds are energizing, satiating, and deeply nourishing to our body, mind, and soul. Seeds contain a variety of vitamins, minerals, nutrients, and special qualities that balance the body and positivity influence our hormonal health. Make a batch every weekend to keep on hand for radiant snacks throughout the week!

IMG_5004.jpg

R E C I P E

1/2 cup raw pumpkin seeds
1/2 cup raw sunflower seeds
1/4 cup raw sesame seeds
1/4 cup raw flax seeds
11/2 cup dates
1/4 cup shredded coconut
2 tbsp coconut oil
1/4 cup coconut flour
1 tsp pure vanilla extract
Pinch of sea salt

M E T H O D


Combine all ingredients in a food processor. I use the Hamilton Beach food processor - it’s seriously the best one I’ve found. A powerful food processor is your greatest kitchen helper, and this one will suit all of your blending needs and dreams! Begin to blend everything together, slowly increasing the speed as you go. Scrape down the sides with a spatula as needed! After a couple of minutes, a sticky ‘dough’ will begin to form. Scoop the batter into mounds, and gently form into balls. Use lightly damped hands for easier rolling. Place the balls on a plate, and sprinkle with your favourite powders, spices, and adaptogens. Place in the fridge to set. Serve cold, and enjoy! 🌞 Keep leftover mounds in the fridge or freezer to preserve.

IMG_4401 2.jpg

Gut-Healthy Peppermint Hot Chocolate

Tis the season of peppermint!


During the holiday season, my cravings for peppermint always increase. This minty hot chocolate is the solution. To make this nourishing winter latte, you’ll just need a handful of simple and wholesome ingredients: raw cacao powder (or organic cocoa!), full-fat coconut milk, peppermint oil, and your favourite collagen or grass-fed gelatine. I like to add a scoop of greens powder or a dash or spirulina to achieve that natural green hue.

This elevated gut-healing peppermint hot chocolate is a healthy (and more affordable!) alternative to the one you’ll find at your local coffee-shop. Raw cacao is a medicinal superfood; rich in antioxidants, minerals, and natural enzymes. Coconut milk offers a source of healthy fats and anti-fungal properties, while collagen provides nutrients like l-glutamine and essential amino acids to help repair our gut lining.

Get cozy, put on your favourite holiday tunes, pour yourself this peppermint latte, and sip slowly.

Ingredients

  • 2 tbsp raw cacao powder

  • 1 scoop collagen peptides

  • Generous splash of full-fat coconut milk

  • 1/8 tsp peppermint oil

  • A mug full of hot water

  • Honey, maple syrup, stevia, or monk fruit to sweeten

Optional - Greens powder, spirulina, or chlorella to colour

Method

In your blended, combine raw cacao powder, a scoop of your favourite collagen or gelatine, peppermint oil, coconut milk, hot water, and a little natural sweetener. Additionally, add a scoop of greens powder of a dash or sea-greens for a natural green colour. Blend the mixture together on low-speed for about 60 seconds, until a thick and bubbly foam has formed on the top. Topped with a little crushed extra dark chocolate or additional cacao powder for good measure.

RAW ALMOND BUTTER CUP BALLS

These nourishing no-bake Raw Almond Butter Cup Balls are the perfect hormone-balancing treat! Made with a handful of simple ingredients, these rich and delicious balls satiate a sweet tooth, elevate our mood, and encourage a healthy menstrual cycle. Almonds are rich in vitamin e to support balanced estrogen production, while organic cocoa is filled with minerals like magnesium that help reduce PMS symptoms. Make a batch, pop them in the fridge or freezer, and keep on hand for a simple + delicious luteal-phase snack!

IMG_9001.JPG


RECIPE

I N G R E D I E N T S


1 cup dates
1.5 cups dry roasted almonds
1/8 cup cocoa powder
1 tbsp coconut oil
Pinch of sea salt

M E T H O D

  1. Combine all ingredients in you food processor, and blend until a smooth dough forms.

  2. Shape into balls, sprinkle with additional superfoods and seeds (if desired), and place on a plate or parchment-paper lined baking tray

  3. Refrigerate until chilled, and serve cold. Keep fresh in the fridge or freezer, depending on which consistency you prefer!

Cauliflower Oats

5DEB7980-86DB-44F1-A450-5095261EE390.JPG

Cauliflower. The secret to thick, creamy, voluminous oats. Did you know?!

My body always asks for oatmeal when autumn rolls around. When we start tuning in, we notice these seasonal shifts in energy levels, fluctuating mood, and the foods we crave. And these days, I just love starting the morning with a comforting bowl of warm oats. I recently began adding riced cauliflower to my oatmeal, and it’s become a real game-changer. The vegetable adds texture, thickness, and so many nutrients, without sacrificing flavour. You honestly can’t taste it at all!

Cruciferous veggies like cauliflower help support our hormones and balanced blood sugar. The high fibre content encourages liver detoxification and excess hormone elimination, while supporting optimal digestion. Try your best to buy organic cauliflower (or local when in-season!), as the conventional alternative is heavily sprayed with harmful chemicals.

I always use frozen-riced cauliflower for this recipe, but fresh cauli works too! I usually buy my cauliflower rice pre-made for convenience sake, and store it in the freezer for tons of simple recipes. You can find cauliflower rice in the frozen section at many grocery stores (I buy mine in bulk from Costco!), or you can easily make your own. To make cauliflower rice, wash and chop a whole head of cauliflower into chunks. Place in a food processor, and process on high for 2-3 minutes until the cauliflower resembles small, “rice-like” crumbles.

D94F6BF7-737D-4166-8151-7CB2B221613C.JPG

CauliFlower Oats

Recipe

  • 1/2 cup gf rolled oats

  • 1 cup riced cauliflower

  • 1 cup water or unsweetened nut milk of choice

Optional Add-ins

  • Sweetened plant-based protein

  • Spices like cinnamon, vanilla, nutmeg

  • Nuts, seeds, nut butter

  • Sliced banana or frozen berries

  • Honey or maple syrup to sweeten

Method

In a small pot, combine oats and water or nut milk, and bring to a boil. Once boiling, turn to medium-low and cook until the oats begin to thicken. Add you cauliflower, and continue to cook for 2-3 minutes until soft. Remove from heat, stir in additional add-ins, and serve.

Coconut Vanilla Bliss Balls

Bliss balls are like little balls are pure bliss. They’re perfect in the afternoon with a cup of tea, as a grab-and go snack during those extra busy days, or post-dinner as the perfect lower-sugar treat.

When choosing snacks that I know will nourish me, I like to follow a few simple guidelines: I want a snack that’s wholesome, minimally processed, and made with simple real-food ingredients. And just as importantly, I make sure my snacks contain a generous amount of good-for-you fats and protein to encourage satiation and satisfaction. Eating good quality fats like nuts, seeds, and cold-pressed oil is essential for shutting of our hunger hormones and keeping blood sugar levels balanced.

So let’s let go of any fear we may have around fat, and start celebrating it!

IMG_1176.JPG


A Note on Soaking

Think of nuts and seeds as little closed packaged. We have to actively ‘open’ them to obtain their maximum nutritional properties. However, breaking down these foods can be a challenge for our digestive system - especially when digestion isn’t working optimally. This is when soaking comes in handy! When we soak our nuts and seeds in water (and an acid!), the protective outer layer easily dissolves and we’re able to unlock the plant’s full nutrient spectrum. Soaking is essentially ‘pre-digestion’.

Recipe

  • 10 mejool dates, soaked*

  • 1/3 cup coconut flour

  • 1 cup nuts (I recommend a blend of hazelnuts + cashews)**

  • 1/4 cup seeds (I used hemp, but sunflower + pumpkin work too!)**

  • 1 scoop vanilla protein powder or collagen

  • 2 tbsp coconut or MCT oil

  • 1 tsp cinnamon

  • Pinch of sea salt

*Place dates in a bowl and cover with boiling water. Let sit for 5 minutes to soften. This will make them much easier to blend!

**To soak your nuts and seeds, place them in a mason jar and cover with filtered water. Additionally, add 1 tsp lemon juice or vinegar to maximize the result. Let soak for 2+ hours (or overnight), drain, rinse, and use. Please note that tiny seeds like hemp, chia, flax + sesame should not be soaked.

Method

Combine all ingredients in a food proccesor or high-power blender. I use and recommend this one by Hamilton Beach, but any food processor will work. Pulse the mixture a few times to get things moving, then blend on medium-speed until ingredients are fully blended and a smooth mixture forms. Pause to scrape down the sides as needed.

Once fully pureed, roll the ‘dough’ into small golf-ball sized balls. Place in the freezer or fridge to set, and serve cold. The balls can be stored in the fridge for up to 5 days, or in the freezer for weeks. Where you store them will depend on which consistency you prefer. :)

Mint Chocolate Cauliflower Smoothie

Mint + chocolate are the perfect duo.

I’m keeping it simple and sweet today with this decadently delicious cauliflower smoothie. It tastes like mint chocolate chip ice-cream, but it’s dairy-free, nutrient rich, and much lower in sugar. This is my go-to when I’m craving dessert for breakfast.

Happy almost December, friends!

Recipe

  • 1 cup steamed then frozen cauliflower

  • 1 baby frozen zucchini

  • 1/2 frozen banana

  • 1 scoop vanilla or chocolate protein

  • 1 scoop collagen greens powder

  • 1 cup coconut milk

  • 1/4 tsp pure mint extract

  • Dark chocolate or cacao nibs for topping


Method

Blend all ingredients together in a high-speed blender until thick and creamy. Adjust the liquid as needed to achieve your favourite consistency.

Gut-Healthy Apple Pie Bites

Tis the season of crisp apples, wholesome oats, and warming autumnal spices!

E1DF3C7D-9FE6-4FEB-8FE9-8B1C1531AD23-F43152AD-2243-41AB-8273-BC5F4EC8DB42.jpg

To celebrate the beginning of fall, I’m sharing my Gut-Healthy Apple Pie Bites recipe in collaboration with Holy Crap. Holy Crap is one of my favourite local Sunshine Coast-based companies. They make a wide selection of gut-healthy, high-protein breakfast cereals made from one of my most loved superfoods; seeds! This recipe features Holy Crap’s Maple Oat Superseed Blend; a mix of gluten-free oats, chia seeds, hemp hearts, buckwheat, dried fruit, cinnamon, and pure maple syrup. This blend tastes like fall in a bowl, and makes the perfect addition to autumn inspired recipes. Or, just add freshly boiled water and enjoy the breakfast cereal all on it’s own!

Bliss balls are one of my favourite snacks. I naturally gravitate towards them year-round because they’re delicious, satiating, and just so easy to make. These simple Apple Pie Bites contain a variety of wholesome ingredients, take only a few minutes to whip up, and last for weeks in the fridge - making them the perfect prep ahead snack! All you need is a food processor, a handful of pantry staples, and your favourite fall spices.

E657C8C0-7B4C-49C1-ABAC-0D3488C3B500-864C9EA7-576A-4CDE-8161-5E4F84803386.JPG

Recipe

Method

Combine all the ingredients in your food process, and process on low until a smooth ‘dough’ forms. Roll into balls, and place on a large plate or parchment paper-lined tray. This recipe makes about 15 balls. Pop in the freezer or fridge to set, and keep frozen for preservation. The bites will last approximately 5 days in the fridge, or multiple weeks in the freezer - although, they never last more than a couple of days around here!

SWEET POTATO BLENDER SOUP

The evenings are growing darker, the mornings becoming colder, and September is right around the corner. Soup season is here! Each year, I welcome the seasonal transition by incorporating more grounding dishes like starchy root vegetables, cooked foods, and autumnal spices. Warming, grounding foods help ease our body through this physical and energetic shift.

And what more fitting way to celebrate the beginning of fall than with a simple blender soup for one? With notes of sweet cinnamon, creamy coconut, roasted garlic, and spicy paprika, this soup checks all the boxes. Feel free to double or triple the recipe for leftovers, or if you’re cooking for two!

828A1D50-76B6-46B3-B373-CAD7996C300B-FDA58AE5-7571-4D18-9D66-66B8791780ED.jpg

RECIPE

I N G R E D I E N T S


• 1 medium sweet potato
• 1 carrot
• 2 cloves garlic
• 1/2 small yellow onion
• 1 tbsp coconut cream
• 1 cup vegetable or bone broth
• A dash of cinnamon, cumin, cayenne, + smoked paprika (I love @simplyorganicfoods spices!)
• Sea salt and black pepper to taste


M E T H O D

  1. Cube the sweet potato + carrot, and place on a baking plan along side onions + garlic. Drizzle with extra virgin olive oil, sea salt, + black pepper, and roast at 350 for 25-30 minutes until soft.

  2. Once done, place the roasted vegetables alongside broth, coconut cream, and spices in your blender. I used my Vitamix!

  3. Blend everything together, starting on low speed and gradually increasing until the soup is smooth and creamy. Transfer to a pot, heat, and serve.

Elevated Vegetable Smoothie Bowl

A179E85B-AD29-4D50-B8A5-BACB5F5D5825.JPG

Green smoothies. I truly believe starting our day with a big bowl of blended green goodness is one of the BEST (and most simple) ways we can nourish ourselves and give our body a little extra love. Our first meal sets the tone for the rest of the day. While sugary cereals or pancakes can leave us feeling lethargic, green smoothies make me feel light, satiated, energized, and nourished. You can seriously fill them with whatever veggies you have on hand. It’s the easiest and most delicious way to pack in an abundance of plant nutrients and more greens then you could imagine, right when you wake up!

The downside of smoothies is that they can often leave us feeling bloated. This happens when we drink a smoothie without actually chewing it! That’s why I choose to eat smoothie bowls. Turning our favourite smoothie into a smoothie bowl by thickening it up encourages us to actually sit down, be mindful, and CHEW our smoothie inside of mindlessly sipping it back on the go. Chewing is an essential first step for initiating the digestive process, even for blended foods!

One of my favourite tricks to making smoothie bowls even more nourishing is elevating them with nutrient rich powders, mixes, and blends. That’s why I’m so excited to share this Elevated Vegetable Smoothie Bowl with you all in collaboration with Garden of Life, using their newest superfood product: Raw Organic Perfect Food Greens Powder.

Perfect Food Greens Powder is a powerful blend of fermented and sprouted whole-foods and 45 superfood ingredients like sea vegetables, juice grasses, and probiotics to support a healthy gut. Your guys, this supplement is POWERFUL. It’s more of a potent multi-vitamin then a powder, and the perfect addition to any smoothie.

1E381487-CACC-41A7-B39C-A3585EE7801C.JPG
 

Ingredients

  • 1 extra ripe banana

  • 1 cup frozen cauliflower, zucchini, broccoli, or cucumber (I like to do a blend of a couple, or them all!)

  • 1 scoop plant-based vanilla protein powder

  • 1 scoop Garden of Life Perfect Food Powder

  • 1 tbsp flax or chia seeds

  • 1 tbsp nut butter of choice (I like peanut, almond, or cashew)

  • 1 cup dairy-free plant milk

Method

Combine all ingredients in your blender, and blend on low speed for 1-2 minutes or until smooth. Pour into a bowl, top with your favourite goodies, and serve. I love to use fresh fruit, frozen berries, seeds, or low-sugar granola. Optionally, cover the smoothie bowl and chill in the fridge if you’re prepping breakfast for the next day.

Seed Cycling Bliss Balls

2A13DA46-6EB2-496F-AEAE-500534A58C8C.JPG

I first heard about Seed Cycling a few years ago, when I decided to stop taking hormonal birth control pills and my period completely disappeared. I was intrigued by the idea of balancing my hormones (and hopefully bringing back my cycle!) using the nutrients in seeds, so I decided to give it a try. After a month of diligently taking my seeds every day, my period finally came back all on it’s own. I also noticed other incredible changes, like reduced PMS symptoms, clearer skin, and a more-regular cycle over the coming months. That’s when I truly fell in love with the process and became a firm believer in the power of seeds!

If you’re new to Seed Cycling, it’s essentially the practice of rotating specific seeds throughout the month, depending where you are in your cycle. The most important aspect of Seed Cycling is to make sure to consume your seeds ground. When we eat whole seeds, they often do not digest properly. But by grinding the seeds, we ensure our body can absorb the full nutrient spectrum.

There are plenty of ways to eat ground seeds (in smoothies, oats, or sprinted on top of yogurt bowls), but grinding our seeds every day can be a tedious task. I wanted an easy way to prepare my seeds so they were ready to go anytime of day.

Cue - Seed Cycling Bliss Balls!

These little balls are so simple to make. I prepare a batch every Sunday, so they’re ready for the week ahead. Just store them in the fridge or freezer for a quick snack or deeeelicous smoothie bowl topping. To make, all you need is whatever two seeds you’re currently taking depending on where you are in your cycle (either sunflower and sesame, or pumpkin and flax), some dates, and a food processor or high-speed blender.

CE03F5C6-2072-40E6-A4A9-7BEBED491F69.JPG

Ingredients

  • 7 tbsp sunflower OR pumpkin seeds

  • 7 tbsp sesame OR flax seeds

  • 14 dates

  • 4 tbsp coconut flour

  • 1 tbsp coconut butter

  • 1 tbsp nut milk or water

Method

Combine all ingredients in your food processor or blender. Process on low speed until a smooth, ‘dough-like’ batter forms. Roll into balls (this recipe is designed to make 7 / a week’s worth of balls) and place in the fridge to set. Eating one bliss ball per day will give you the recommended amount of seeds for seed cycling.

If you’d like to learn more about how to Seed Cycling, I have a blog post all about how to do it here.

Nourishing Almond Butter Cup Balls

I’m easing into the first few days of March by setting my monthly intentions, “Spring Cleaning” the house, and getting ready for my big move out of the city and into our very first ever HOME! After 4.5 years in my little Downtown Vancouver apartment, I couldn’t be more ready to move back into the peace and quiet of nature. Hello slow and silent mornings, forrest bathing, and daily ocean swims! I ’m so excited to take you all along on this new journey and chapter of our lives.

Aside from the move (which I can’t wait to share more about soon!), this past week I finished my program at the Canadian School of Natural Nutrition. In three short weeks, I’ll be a Registered Holistic Nutritionist! This month is all about big changes, moving towards fear, and letting go of the old to make room for the new.

69ACB8D9-5927-4337-BEB9-8EF4D69AB880.JPG

Amidst the excitement and nerves, I’m learning to find calm in the chaos. When life gets hectic and big changes are taking place, I naturally gravitate towards simplifying the areas of my life where I can. This means clearing my schedule of unnecessary tasks, incorporating little relaxation breaks throughout the day, and nourishing my body with simple, easy to make recipes.

When New World Foods gifted me a few of my favourite nut butters (hello almond and cashew!), I immediately knew that I wanted to create a quick, easy, and delicious snack to fuel me during these busy days. Preferably made with minimal ingredients and no baking required. And so, these Nourishing Almond Butter Cup Balls were born. The star of the show is New World Food’s Organic Dark Chocolate Almond Butter, along with a couple of pantry staples like almond flour, dates, and cocoa powder. If you can’t get your hands on this delicious chocolate butter, any almond butter can easily take it’s place!

938F1299-1FE6-46CC-B0A1-6CBF2A127AA8.JPG

Recipe

Ingredients

*I recommend soaked your dates to make them easier to blend. Simply place them in a bowl and cover with boiling water. Let soak for 5-10 minutes until soft, strain, and use!

Method

These balls are SO simple to make. Place all ingredients in a food processor (or high speed blender like a Vitamix!). Pulse a few times to get things moving, then blend on medium speed until a sticky dough forms. When the mixture is smooth, roll into little balls (the recipe will make 8-12, depending how big you want them) and place on a plate. Optionally, you can roll them in fun toppings like shredded coconut, hemp hearts, and bee pollen. Pop the balls in the fridge for a minimum of 1 hour to let them set. Store refrigerated, and serve cold.

Soaked Buckwheat Granola

IMG_1802 2.JPG

Buckwheat! This little gem isn’t a grain, but it sure resembles one. Buckwheat is actually a grain-like seed, making it suitable for grain-free and paleo dishes. It’s gluten-free, high in protein, and packed with nutrients like magnesium, b-vitamins, and digestive-loving fibre. Buckwheat groats are so versatile, too. You can grind them into flour for making breads, pancakes, and wholesome versions of your favourite baked treats, or cook them into hearty porridges and rice-like dishes. Talk about a powerhouse!

One way I personally love using buckwheat is in homemade granola. Did you know that it’s SO easy to make your own? And not only does homemade granola take a matter of minutes, it’s also way better for you and your body. Say goodbye to the sugar-ladened verities at the grocery store that contain sneaky additives and an ingredient list that’s a mile long. With only a handful of simple, real foods (that are probably already have stashed away in your pantry!) this buckwheat granola is free from gluten, grains, refined sugars, and full of nutrients and plant protein to help you feel satiated and nourished.

Soaking Your Buckwheat

When preparing buckwheat, I always recommend to soak the groats first. Like other grains and seeds, buckwheat contains ‘anti-nutrients’ such as phytic acid that interfere with our body’s ability to absorb minerals from our food. Soaking also soften’s the hard-to-digest fibres and starches that often irritate our gut lining. No more tummy pains or uncomfortable bloat!

The evening before making my granola, I place the buckwheat groats in a bowl and cover them with clean, filtered water. Then, add 1 tbsp of apple cider vinegar or lemon juice (the acid helps to break down the seed’s phytic acid!) and let them sit on the countertop overnight. In the morning, the buckwheat will have absorbed some of the water and a sticky, goopy gel likely has formed. Don’t worry, this is totally normal! Just place them in a sieve and rinse until clean.

Recipe

  • 1 cup buckwheat groats (soaked overnight, then rinsed)

  • 1/2 cup unsweetened shredded coconut

  • 1/2 cup raw chopped nuts, soaked overnight* (I used cashews)

  • 1/4 cup seeds (I used hemp hearts)

  • 1/4 cup dried fruit (I recommend blueberries or goggi berries!)

  • 2 tbsp organic honey or maple syrup

  • 1 tsp cinnamon

  • 1 tsp pure vanilla extract

  • Pinch of sea salt

*If you’d like to take your needs to the next level and fully unlock their entire nutrient spectrum, you can soak them, too! Just follow the same method I outlined to soak the buckwheat groats.

Method

Soak your buckwheat overnight, and rinse until clean. Preheat the oven to 350 degrees. Spread the groats across a baking tray, and allow them to air dry OR pat down with a paper towl to absorb the excess liquid. Then, combine the buckwheat groats along with the other ingredients in a bowl, and stir until the mixture fully sticks together. Spread the granola across a baking sheet lined with parchment paper, and bake for 20-25 minutes, staring the granola about halfway through the ensure it cooks evenly. The granola is done when it’s toasted and crunchy!  Store in a lined jar on the countertop to keep fresh. I love sprinkling the granola on my coconut yogurt and smoothie bowls, or eating it straight up with some good old nut milk and a spoon.

Creamy Coconut Chia Pudding (2-Ingredients)

BE9BA5FA-B05B-436F-AF15-AEF8F7469FA0.JPG


Oh, chia. How I love you.

Weekday mornings can be a little hectic. Can we all agree? I like to set myself up for the week ahead with a technique called meal preparation - and Sunday’s are my day! Essentially, meal prep looks like batch-making easily storable meals for the coming days ahead. Chia seeds are a true gift from nature for prepping easy make-ahead breakfast recipes. You can mix them with oats, toss them into smoothies, or even use them as an egg replacer for pancakes and french toast. But my personal favourite way to use chia? In chia seed pudding, of course!

I love chia seed pudding because you truly only need 2-ingredients and just a couple of minutes to make it. It’s super filling, incredibly nourishing, easy customizable, and lasts for days in the fridge. Chia seeds are also quite nutrient dense, offering a generous source of protein, omega-3’s, and gut-supportive fibre. My secret to creating thick and creamy chia seed pudding is using Silk’s Unsweetened Coconut Beverage for the base. It’s a delicious plant-based milk replacement, and tastes even creamier than dairy-filled alternatives.

A133DF77-62AE-49CA-BA54-ED572424165C.JPG

Creamy Coconut Chia Pudding

Time: 5 Minutes
Servings: 1


Ingredients

Optional add-ins

  • 1-2 tbsp maple syrup or honey to sweeten

  • 1 tsp pure vanilla extract

  • Berries, sliced banana, chopped fruit

  • Nuts, seeds, + shredded coconut

  • Plant-based protein powder

Method

  • In a mason jar, bowl, or glass container, combine chia seeds and coconut milk. Whisk together until the mixture is fully incorporated.

  • Cover and place in the fridge. Let sit for a minimum of 2 hours (or overnight) to allow the mixure to thicken.

  • Add any optional add-ins you desire, and serve cold.

This post was Sponsored by Silk Canada, but all thoughts and opinions are my own.

Pumpkin Chickpea Cookies

They’re high in protein. No grains, gluten, eggs, or dairy. And, the recipe is completely refined-sugar free.
This is my kind of cookie.

Pumpkin Cookies 2.jpg

Recipe

  • 1 cup chickpea flour

  • 1 tsp cinnamon

  • 1/4 tsp nutmeg

  • 1/8 tsp salt

  • 1/4 tsp baking powder

  • 1/8 tsp baking soda

  • 1/4 cup coconut oil, melted

  • 1/3 cup honey or maple syrup

  • 1/4 pure pumpkin puree

  • 1/2 tsp vanilla

  • 1/3 cup dark or semi-sweet chocolate chips

Method

Preheat oven to 350 degrees. Line a cookie sheet with parchment paper. Combine dry ingredients and whisk together. Add the coconut oil, honey, pumpkin puree, vanilla, and stir to incorporate until a smooth sticky batter forms. Fond in the chocolate chips. Drop batter onto cookie sheet into golf-ball sized bounds. Bake for 8-12 minutes, until the bottoms are golden brown.